SSDT Database Unit Test: Cleanup after Test Execution

In my previous research about database unit testing in SQL Server Data Tools I’ve found that data inserted into tables during test had not been deleted automatically. You should create a cleanup action manually.

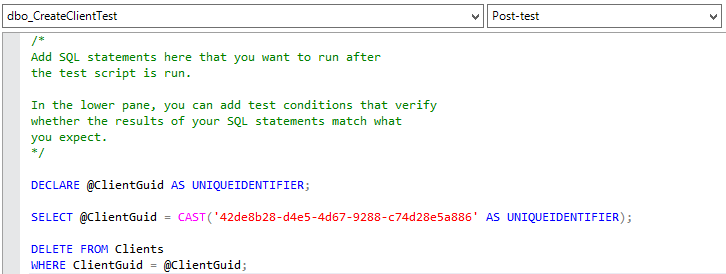
  • Choose an item Post-test in dropdown list shown below.
Create post-test
  • Click the link Click here to create in the center of Test Designer.
  • Write T-SQL code to delete test data.
Post-test delete

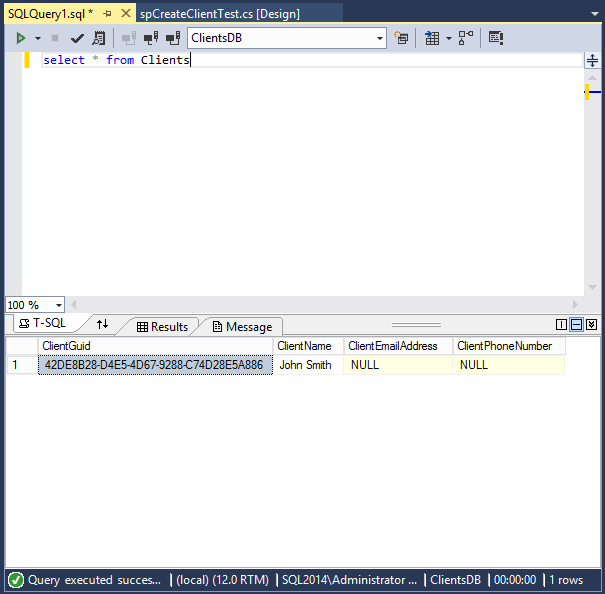
I truncate table Clients and run my test. Test is OK and there’s no test data in Clients table. So I could run my test as many times as needed.

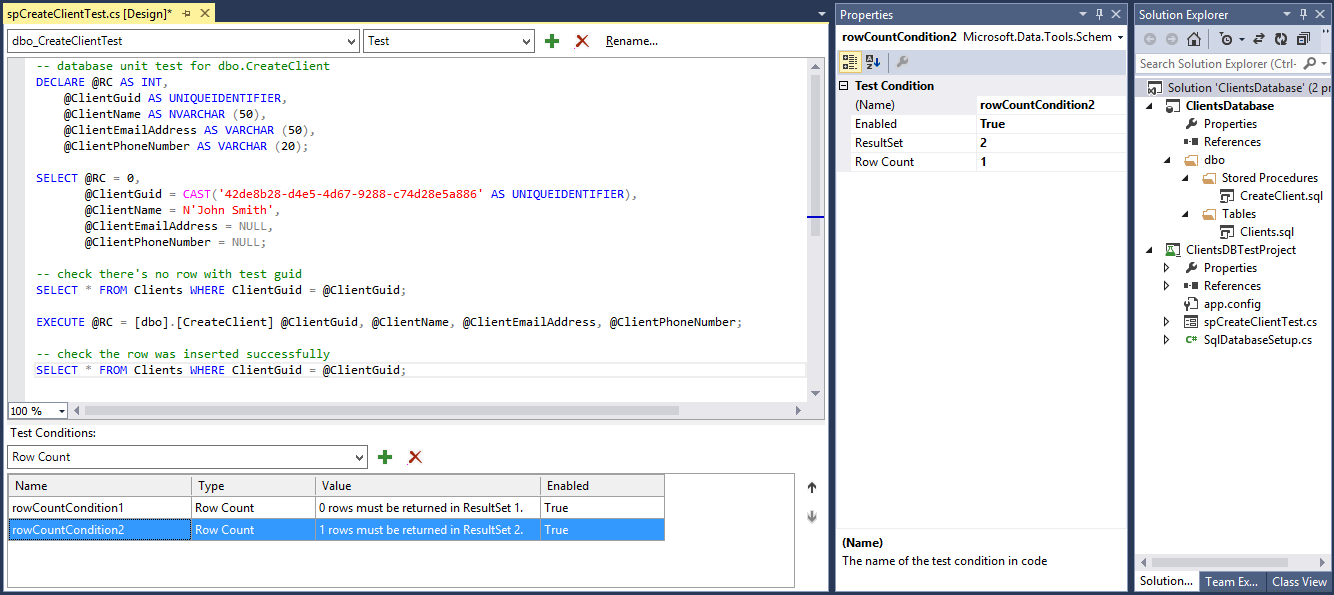
There’s a possibility to include test condition even in post-test phase. Wonderful, I’ll check that test data is deleted successfully.

  • Add simple SELECT command to query rows with test guid.
  • Add test condition to check no data is returned. This can be made with Row Count = 0 condition or Empty ResultSet condition. I choose the second.
The whole post-test action looks like this:
post-test delete with check
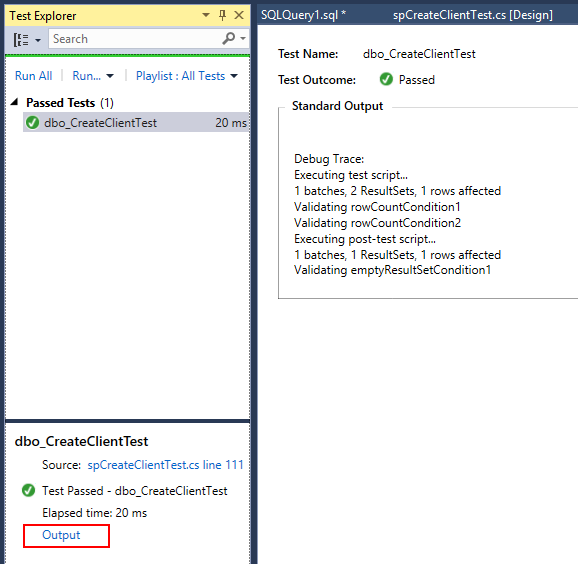
Unit test has passed. If you are in doubt about all actions or not were really performed, you can check the output of the test. To see it click the Output link at the bottom of Test Explorer pane.
Test output

SSDT Database Unit Test: Checking a Simple INSERT Command

I have a very simple database for experiments with SQL Server unit tests. ClientsDB database contains just one table Clients with no records:

Clients table

and one stored procedure CreateClients:
CreateClient stored procedure

I have created a database project ClientsDatabase and a SQL Server unit test project ClientsDBTestProject to test my stored procedure. The autogenerated test (slightly formatted for readability) is shown below.

spCreateClientTest

To create a simple test we must do:

  1. change assignments in first SELECT command and set test parameters such as client guid and name;
  2. delete the last SELECT command because the stored procedure does not return any value (there’s no RETURN statement in SP);
  3. insert a SELECT command before EXECUTE command to check that there’s no row with the test guid in Clients table;
  4. add a SELECT command after EXECUTE command to check that row with the test guid has inserted into Clients table;
  5. delete the autogenerated test condition inconclusiveCondition1;
  6. add first test conditions with type Row Count. Set the property Row Count to 0. Also you should check that property ResultSet is 1;
  7. add second test condition with type Row Count. Set the property Row Count to 1 and change ResultSet to 2.

Finally our unit test should look like this:

spCreateClientTest - final

Now we are ready to start our unit test.

  • Open Test Explorer (Test -> Windows -> Test Explorer)
  • Right-click dbo_CreateClientTest, then Run Selected Tests or simply click Run All because we have only one unit test.
  • If test has completed successfully, we see a green mark near the test name.
spCreateClientTest - success
Our test is working, everything seems OK. But…
Check the data in Clients table (thanks to SSDT, it can be made from Visual Studio now, or you can use SQL Server Management Studio).
select from Clients
 And now we see our test record. Is it funny? I think NO. This means that test data is not deleted after the test has been executed therefore the next time we run our test it would fail. Don’t forget about it!
It’s not a tragedy because SSDT has capabilities to solve this issue. I’ll write a post about it later.

Simple Way to Create a Database Unit Test Project in SSDT

Another interesting feature of SQL Server Data Tools (SSDT) is a unit testing. SSDT enables to develop and execute unit tests interactively in Visual Studio. You can write tests for stored procedures, functions and triggers.

To create a simple database unit test project you need Visual Studio + SSDT, of course, and a database project (how to create it I wrote in this post).

  • Open your database project in Visual Studio
  • Find the object to be tested in Solution Explorer
  • Right-click and select Create Unit Tests
Create unit test
  • In Create Unit Tests window check that only one database object is selected (on which you right-clicked earlier).
  • Choose the type of test project (Visual Basic or C#). This does not influence the database tests, it’s just a language of test project. As you see later all the work around the test will be made in the graphical interface of test designer.
  • Type the name of your test project and the name of a test class.
Name unit test project
  • Press OK button.
  • In SQL Server Test Configuration choose an existing connection (I’ve created it earlier during the creation of database project) or create a new connection, then press OK.
  • Visual Studio will create a database test project and unit test. This unit test will be opened automatically in Test Designer.

Unit test